Preorder for expo pickup now to skip the lines and guarantee availability
AND get 15% off your order!
Use the codes below and choose "Local/Expo Pickup" at checkout.
Please note that codes are for expo pickup orders only at this time :)
Las Vegas Sep. 19-20 - Code: VegasRepExpo2026
Wasatch SLC Oct. 24-25 - Code: WasatchFall2026
Isopod and Springtail Care

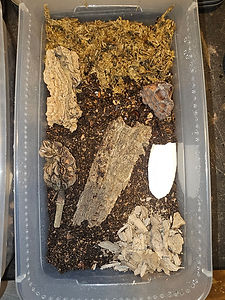
The image above is showing the basic isopod setup before leaf litter and cuttlebone is added.
Isopods are generally one of the more simple pets to take care of, but specific care does differ by species so make sure to research your specific species of isopod or feel free to send us a message with your species and we would be more than happy to walk you through their specific care requirements so you can have a beautiful, thriving colony.
If you will be keeping your springtails with your isopods, you can just add your springtails directly to your isopod bin. If you received your springtails from us, you most likely received them in a small cup lined with clay or a damp paper towel. For the clay, simply open the container and tap them in. For paper towels, open the cup and you can try to shake them off, or you can place the paper towel directly in the enclosure and allow them to come off on their own.
Clay instructions will be located below isopod care.
Isopod Care
Notes on basic setup and isopod species:
The image on the right of this paragraph is going to be what a basic/simple isopod set up will look like, minus the leaf litter. You’re going to want to add a minimum of 2” of substrate (the deeper it is, the longer it will hold moisture) to the enclosure and level it out. Add a layer of sphagnum moss to the side of the bin that has the least amount of ventilation and use this as your wet side. If you’re only using one hide, place this towards the middle of the bin and try to place it over some of the wet side and the dry side so the isopods can self regulate. If using multiple hides, you can place one over the wetter side, one of the dry side, and some in between to create microclimates. Place a piece of cuttlebone or calcium source somewhere in the middle of the bin. And then scatter a thick layer (1.5 or more inches) of hardwood leaf litter over the entire bin. You can leave the moss uncovered if you prefer though.
While the basic set up is going to look basically the same for all isopods, the ventilation and humidity requirements will vary by species. Spanish giants such as Porcellio bolivari, Porcellio expansus, Porcellio haasi, Porcellio hoffmannseggi, Porcellio ornatus, and Porcellio werneri, to list a few, are going to like more cross ventilation with a moisture gradient of about 20-25% moist and the rest dry, where as the more tropical species such as certain Cubaris, Redunctoniscus, and Venezillo for example are going to like less air flow with a moisture gradient of 80%+ wet with a smaller dry area. And then you’re going to have the Ardentiella and Laureolla species that are going to want a more arboreal set up with high ventilation and high humidity. So, it’s always very important to do some research and learn about the specific species you’ll be keeping so you can fine tune their enclosure to their specific needs. We’re always here to answer any questions or walk you through the care and set up.
Enclosures
You have quite a few options when it comes to isopod enclosures. The biggest thing you’ll need to keep in mind when choosing an enclosure is what species you’ll be putting in it. Is it a fast breeding species? A smaller dwarf species? A Spanish giant that is going to desire cross ventilation versus just top?
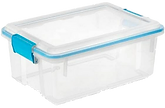
If you’re not wanting anything real decorative or fancy, you have quite a variety of budget friendly options such as the cheap plastic shoe boxes or storage bins that can be readily found at Walmart or Home Depot for a couple bucks. You can start a culture of 10 in one of these 6 quart bins, or if it’s a faster breeding or larger species, you can put them directly into a 12 quart. These are the most popular choices among keepers as they are very versatile, lightweight, cheap, and customizable. Or if you're worried about possible escapees, you can get a latching bin with an airtight gasket.
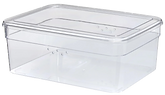
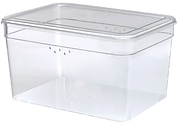
You can also find clear plastic shoe boxes at certain Walmarts if you’re wanting something in between basic and more pleasing to the eyes, but I recommend hot gluing a piece of mesh fabric over them to prevent any escapes as the holes are closer to where the top of the substrate is and all the furtiture are going to be so they'll be able to access them easier. The images of these on the right side of this paragraph are linked to the product page on Walmart.com if you click on the image.
If you’re not going to be keeping a bunch of species or have the room and want something more pleasing to the eye, you have the options of glass aquariums. These have their own cons such as weight and they can be a little tricky depending on the top you’ll be using and the species being used in them. Depending on the top you’re using, some can let the moisture out very quickly and dry out your enclosure which is never good for any species and then some won’t allow for much airflow so if you’re using something like this, you’ll want to add a species that does well in low ventilation environments.
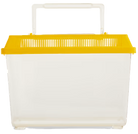
Kritter Keepers and similar enclosures will work, but you’ll need to be cautious with the airflow on these as they will dry out very quickly and you’ll need to be watering probably every day or two or you’ll want to modify the tops to restrict the amount of ventilation and even then I would still recommend keeping a close eye on them.
With any enclosure, as your colony grows, you’ll eventually need to either split the colony to multiple bins or move them to a larger bin.
Ventilation
There’s also a few different options for ventilation for isopods! All isopods are going to prefer cross (side) ventilation in their homes versus top ventilation as side vents allow for more air circulation and is great if you’re going to be stacking your bins. Certain species such as Ardentiella are going to thrive better with forced air and a couple keepers have created small fans that screw into your bins for these species.
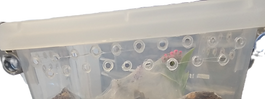
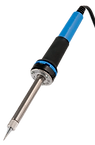
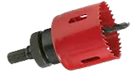
If you’re wanting to stay simple and budget friendly, you can get a soldering iron and melt small holes around the sides of your bins towards the top. You can also use a small drill bit for this but it will be more time consuming and messy. One of my favorite choices is to get a spade bit or hole saw for a drill and using those to put holes around the dry side and then hot gluing pieces of weed barrier fabric or fine wire mesh over the holes. It might not be the prettiest, but it allows for a good amount of air circulation and nothing is going to get in or out of the holes.
If you’re wanting something more aesthetic, there’s a lot of different options as far as 3D printed vents that other keepers have designed that are going to screw into your bins. These will require either a hole saw or spade bit to create the holes. These can be found on Etsy or Ebay.
Regardless of the method you go with, you’ll want to keep the ventilation towards the dry size of the enclosure and leave the side you’re going to keep moist vent free or at least to a minimum with maybe one hole on the very back of the bin. The more ventilation you add, the faster your enclosure will dry out and may require more frequent watering to prevent a colony collapse. Never allow your enclosure to dry out completely no matter what species as all isopod species require a spot kept constantly moist to wet their gills so they can breathe and for pregnant mothers and mancae (baby isopods).
If you are having to water your wet side more than once every 5 days or so, your bin is drying out to quickly. You can either try adding some more substrate or closing up some of the vent holes, or both.
Substrate
Substrate is going to be one of the most crucial pieces of your isopod’s home. Isopods will use their substrate as a nutrition source, so it’s very important to use a high quality, nutritious substrate. Stay away from anything coconut if at all possible, and if not, make sure it’s only a small portion of the substrate. Coconut doesn’t offer any nutritional value and can cause impaction in Helleria brevicornis and millipedes.
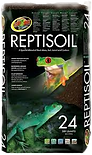
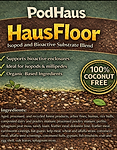
Again with substrate, it really depends on how in depth you want to go with it. You can use a specialized blend designed for isopods such as our own HausFloor that is premixed and ready to use. You can also use a commercialized blend such as ZooMed Reptisoil or Zilla Jungle Mix. There are ABG mixes available online and in some Pet Stores as well, but you’ll want to stay aware of the large horticulture charcoal pieces used in those as they usually end up floating up to the surface and won’t allow water to soak in.
If you will be putting together multiple bins or keep more than a few species, you can go with a more budget friendly/bulk option and grab a big bag of organic potting soil from Home Depot or Lowe’s. Make sure it is organic though to avoid any added fertilizers or chemicals.
Or you can make you own mix with things like organic top soil, potting mix, compost, peat moss, crushed egg shells for added calcium, leaf litter, flake soil, etc. if you’re wanting more than just a potting mix. This is just something you can have fun with and try different mixes and ingredients to see what you like best.
Some species are going to prefer a deeper substrate than others to burrow in, but I would recommend adding at least 2 to 3 inches of substrate in every bin no matter the species because the deeper it is, the longer it will hold moisture.
Hides
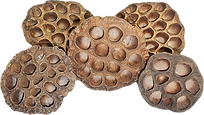
You’ll want to add at least one shelter/hide option to your bin. The most popular options are cork bark or natural hardwood bark pieces. We use both here at PodHaus. We use cork bark on the wet side and then oak bark for the rest of the bin. Other options are egg crates, coconut halves, buddha nut pods, Bolsa Pastor pods, and any other botanicals or biodegradables.
Woods/Barks – You can use cork bark for something that won’t mold easily in humid environments. Another isopod favorite is oak bark or any other chemical/pesticide free hardwood bark. These can mold if used in high humidity environments, so it’s best to use these on the drier side of the enclosure, but they do seem to prefer this type of wood over cork bark. They can consume these barks as part of their food source as well. If only using one piece of wood/bark, place it more in the middle of the bin so your isopods can self regulate and go more towards the wet side or dry side depending on what they’re needing at that time.
Egg crates – You can use old egg cartons/egg crates for them too! They will consume them over time as well as use them as a hiding area.
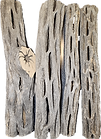
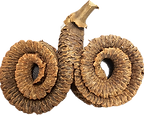
Botanicals/Biodegradables – There are so many different types and shapes of botanicals that can be used with isopods. These are so fun as they not only look cool and add some visuals to your bins, but they serve as a hiding area and food source for your isopods too! Isopods will munch on these over time as they decompose and they often provide great nutrition benefits! Some of the more common items are lotus pods (isopod hotels), magnolia pods, sweet gum pods, cholla wood, moss, and lichen sticks. But there are so many other fun things out there. One of our favorites are the Ram’s Horns Pods. You can check out all our fun choices in the Biodegradables tab on our website (podhausllc.com)!
If possible, scatter different hides throughout the enclosure to add microclimates and allow better regulation.
Leaf Litter
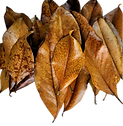
Leaf litter is the utmost importance to your colony. This is going to be your isopod’s main food source. I feed all of my isopods oak leaves and they go crazy for them, but any hardwood leaf will work. Magnolia leaves I have found to be a little too tough for them and it takes them quite a while to make a dent on them, so it’s ok to use them, but I would recommend using a softer, easier to eat leaf to go along with them. You’ll want to stay away from live or freshly fallen leaves and go with an older “crispier” leaf as it will be closer to the decomposed stage that they really love. They will eat all the “meat” off the leaf and leave you with the “skeleton”. Once you see more leaf skeletons versus whole leaves, you’ll know it’s time to replenish. Keep a pretty thick layer, at least 2”+ of leaf litter in their bins at all times. You can spread the leaves over the majority of the area of the bin. If you're worries about pests/hitchhikers, you can either freeze the leaves for a few days, or you can bake them, but I try to err away from baking as it will kill all the beneficial bacteria.
Other items to add
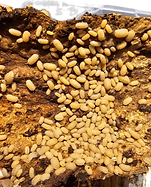
White rot wood – This is very beneficial to most colonies. Some appreciate it more than others while others will do perfectly fine without it. But I will say, every bin I added it to started doing exceptionally better. I feel like I noticed a significant breeding increase and over all healthier bin. I just crumble it up and sprinkle it around the dry side and leave some of the bigger pieces in a small pile and they all seem to love it.
Calcium source – I always recommend keeping a constant calcium source in every bin. It helps keep their little shells nice and healthy and will help keep your colony in tip top shape. I use cuttlebone in all of my bins and some species go absolutely crazy for it. My Armadillidium gestroi hammers down on it and will go through one about once every two weeks. You’ll know it’s time to change it out once the only thing that is left is the thin outer shell and all the “meat” is gone.
You can throw in some pieces of eggshell in the bin but I do feel it’s a bit hard and they have a harder time breaking it down than the cuttlebone. You can also grind it up and throw it in there.
Some will say to add limestone, however, unless it’s in a powdered form, the isopods are going to have a really hard time eating it, even if it’s pulverized. A limestone chunk is mostly going to be more décor.
Botanicals/biodegradables - isopods enjoy all kinds of decaying matter, so you can add additional biodegradables. Some popular items for this are: lotus pods, sweet gum pods, lichen sticks, live moss, magnolia seed pods and soooo many more. These are fun as they not only are beneficial to your little crustaceans to munch on and hide in, but also add some decoration and pizzazz to your enclosure. There’s so many different shapes and colors of seed pods!
Supplemental Feeding
While your isopods’ main diet is going to consist of leaf litter, substrate, and any other decaying matter in their enclosure, a supplement of protein will do your colony good. Some species are going to be more protein hungry than others and will appreciate this more than others, they all seem to enjoy it. This is typically done about once per week.
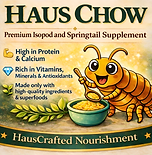
I blend my own food using very high quality ingredients. My HausChow is available on our website or at any expo we’re at. It has protein, calcium, vitamins, and minerals.
You can also use any other commercially available blends such as Repashy’s Morning Wood for isopods or Bug Burger.
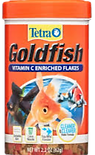
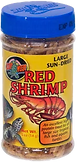
For something readily available, any fish flake or freeze dried shrimp, minnow, meal worms, etc. will do the trick as well. Large flake fish flakes and shrimp are fun to feed species like dairy cows and giant canyons because they will come up and take it from you like little puppies.
To feed them, you can simply sprinkle the powder or flakes directly on the surface of the substrate or you can purchase a small isopod food dish and feed them out of that. You’re going to want to only feed them a small enough amount that they can consume within no more than 36 hours to avoid grain mites and unsightly mold. Start small and gradually increase after observing them. You might feel like you’re starving them, but they have plenty of other things to eat. This is just a little “something something” extra for them.
I also feed a small slice of sweet potato when adding their powder just as something more for them to enjoy and add some moisture. They can eat any really root vegetable, cucumbers, squash, or apple. Stay away from tomato, avocado, and citrus.
Wet side and watering
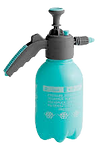
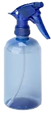
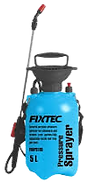
You’re going to want a wet side that is kept constantly moist in every single bin you keep, no matter the species, even the arid ones. To accomplish this, you’ll want to add a layer of sphagnum moss on the side without ventilation. This will hold water in the moss itself and help hold moisture in the substrate below it for longer. We used a pressurized sprayer, but you can use a spray bottle or wash bottle will do the trick too!
When watering, aim for the water to mostly go down the sides of the bin. You’ll want to be able to look at the side from the outside and watch the water reaching the very bottom layer of the substrate to ensure the substrate is soaking in enough water. If you notice the dry side is getting super dry, you can run some water down the sides of the dirt on the dry side as well. Some also say they do that around the whole bin and let the middle area dry out. I personally use a pressurized sprayer and will lightly spray the moss and dirt itself if I feel it has dried out more than it should be.
You’ll typically want to water your bin(s) about once per week, but may require more or less depending on how much ventilation your bin has, how deep your substrate has, the season and/or climate, etc. Just monitor your bin and water as needed to make sure it never dries out.
Bin maintenance and substrate changes
You will begin notice a build up of frass (isopod poop) in your bin over time. Frass can be identified as long rectangular shapes on top of the substrate and furniture. Too much can cause a deadly build up on ammonia and wipe out a whole culture. It also repels water and doesn’t allow the water to properly soak into the substrate. Once you notice a significant amount of frass, you will want to do either a partial or whole substrate change depending on the amount of frass. Substrate changes are one of my most dreaded chores as a breeder. This requires you to either scoop out a large portion of the current substrate, making sure there are no babies buried, or starting a whole new bin and transferring the isopods over to it.
Try to stick with partial substrate changes to avoid a shock to your culture and aim to only change around 50% of the existing substrate at a time. But if it is past the point of a partial, it is best to add a small amount of the old substrate into the new bin when doing a complete change to add beneficial bacteria that they had in their old bin to avoid a nitrogen spike which can wipe out a whole or large portion of your culture. You will want to save the rest of the old substrate for a while to make sure you didn’t miss any teeny tiny babies or others buried in the substrate. Once you are ready to throw away the old substrate, make sure to either bake it for a couple hours or freeze it for 72+ hours to make sure everything that may be in there is dead to avoid releasing any isopods outside as they are considered invasive.
Another part of maintenance is keeping an eye on your culture size. As your culture’s population grows over time, you will either want to move them to a larger bin or split the culture to avoid overcrowding and over use of resources or quick depletion of resources. To do either of these, just set your new bin up similar to their current bin and add some ventilation and transfer the isopods to their new enclosure.
To transfer the isopods when doing a bin upgrade or substrate swap. I like to pick out as many as I can before scooping substrate out or mixing to avoid injuries or death. To do this, I have a separate empty container for the items in the bins and another empty container for the isopods. I remove the leaf litter, cork bark, sphagnum moss, and any other furnishings in the bin and put them in the larger empty container. If there are any isopods on these items, I tap them off into the smaller empty container that is just for the isopods. I then go in with a spoon and carefully scoop any that I can see into the container with the isopods. If you have a spare bin and are doing a complete substrate swap, you can add new substrate to it and then move the furnishings and isopods directly to that bin as you pull them out of the old. Substrate changes are a very time consuming process. A complete substrate swap usually takes me up to an hour per bin depending on the amount of isopods in the bin and how determined I am to get all of them out in that sitting. If I’m just doing a partial, I use the same process, but I’m not as picky to remove as many as I possibly can. I will remove what isopods I can and then add the new substrate and very gently stir the old and new substrate together and then put all the furnishings back and pour the isopods in that I pulled out. If I’m moving them to a larger bin and they populated their current bin quickly and there isn’t a lot of frass, I simply add all the substrate from their old bin to the new and add more substrate, leaf litter, and sphagnum moss to account for the extra room. If there is a lot of frass, just add a small amount of old substrate into the new bin and follow the same process as above.
Springtail Care
If you purchased springtails from us, they will either be in a small cup coated with clay or a damp paper towel. If you received clay, simply open the container and tap the springtails into where they are needed. If you received a paper towel, open the cup and you can either try to shake the springtails from the paper towel into where they are going or simply place the whole paper towel into the enclosure and let them come off by themselves, then remove the paper towel later.
Springtail care is going to vary depending on the species of springtail so it’s crucial to do proper research of your specific species. We’re always here to answer any questions and are more than happy to walk you through the care of your springtails so you have a healthy, thriving, beautiful culture!
The biggest difference is going to be whether you’re going to keep them of soil, clay, charcoal, or other media. Some springtail species will not survive on clay or charcoal and must be housed on a substrate mix. The second most important factor is going to be their preferred climate, whether they’re an arid or humid species.
Here’s the basics of the 3 most popular culturing medias.
Substrate – Any and all species are going to do great on substrate and they’re extremely simple to set up! You can use really any organic soil or potting mix, even coco fiber is fine for springtails. Make sure to bake or freeze your substrate beforehand and cool completely before adding your springtails to prevent pests and other springtail species. Then simply add the substrate to your desired enclosure, spread evenly and wah lah! Springtail culture complete! All you have to do now is watch your springtails and make sure their moisture gradient stays up to par!
Substrate cultures can last a year or more before you need to move your tiny friends to a fresh substrate. You don’t have to add any leaf litter or other furniture to your enclosure , but bark and charcoal pieces do help if you plan on harvesting springtails from substrate. Ventilation can be as easy as just opening the lid every few days for oxygen exchange, to a hole covered with mesh, or more holes covered with mesh if you have a more semi-arid to arid species.
For enclosures, any smaller container is going to be fine really. From 6 quart or smaller plastic Sterilite style storage bins, airtight or not airtight food storage containers, jars (as long as it is a humid species), etc. If you have a more arid or semi-arid species, you’ll want a container that you can add some ventilation to.
Charcoal – All you need for this is lump or horticulture charcoal pieces, a sealed container or tall deli cup, and either distilled or purified water. Add 2+” of charcoal to your desired enclosure and then pour in about 1” of water. For ventilation, you can either simply open the lid every few days to allow oxygen exchange or you can add a small hole with a fine mesh glued over it. To harvest springtails, just pick up a piece of charcoal and tap into where you’re adding them to or you can add additional water and then pour the water into where you’re putting them as they will float on the surface of the water.
For containers, any sealable container that can hold at least 2’ of charcoal should be fine. This could be deli cups, food storage containers, jars, or any other semi tall container.
Springtail clay – Our preferred method here at PodHaus for our Ceratophysella and Folsomia cultures due to the ease of harvesting! You’ll need either a premade clay culture from us, or a springtail clay powder and distilled water, and then an enclosure, most commonly an 8 oz or 32 oz deli cup.
If you bought a premade clay culture from us, simply add your springtails. If you have a powder, add your clay powder and mix with distilled water until it reaches the desired consistency and then add a dollop into your container of choice and use a butter knife or spoon to evenly distribute the clay to a decently heavy thickness.
You’ll want your clay to be moist, but not too moist. A good rule of thumb is when you poke the clay, you only want a small amount sticking to your finger, otherwise the moist clay will absorb the food powder and go bad faster. To water your culture, the best way is to use a pipette to add a few drops of water to avoid overwatering. If you’re good with a
wash bottle, that will work as well.
For ventilation, you can either open the lid every few days to allow oxygen exchange or you can add a small hole and cover it with a fine mesh. Clay cultures will usually last 6 month to a year before your springtails will need to be transferred to fresh clay. To harvest, simply tap the springtails from the clay into where they are needed.


.png)



_edited.png)

_edited.png)
.png)




_edited.png)
_edited.png)
_edited.png)